After having gotten my DSEE6.2 to run on my ubuntu laptop (with the steps laid out in this previous post), I wanted to see how to monitor the beast. Obviously, you can still write scripts as was not unusual with previous versions or gather statistics through querying “cn=monitor” over the LDAP protocol. I was looking for a more elegant integration with monitoring systems, though.
The first thing you have to realize to get started at all, is that DSEE is part of the Sun Java Enterprise System (JES). So, even if the information about monitoring is missing from the point product’s documentation (for DSEE6.0 and 6.1), you can find it in the JES documentation. Then add a few incompatibilities with ubuntu or bugs if you will (because I cannot see how this would work with any other supported Linux distro and the ZIP distribution of DSEE), and you’ll get a node agent for a host running any JES component which will provide information about server instance through JMX and SNMP.
Essentially, you need this:
0. Install DSEE6.2 to ~/dsee6.2 and configure as previously posted
1. Initialize the JES monitoring framework (mfwk)
2. Enable the monitoring plugin in the DS instances to be monitored
3. Register the DS Module with the node agent
Now for the gory (read: technical) details:
1. Initialize the JES monitoring framework (mfwk)
To use the mfwk scrips (for setup and otherwise) on ubuntu (or at all to some extent), you need to modify them as follows:
mfwksetup.pl (don’t use the shell script):
~/dsee6.2/dsee6/mfwk/bin$ diff -Naurw mfwksetup.pl.orig mfwksetup.pl

--- mfwksetup.pl.orig   2007-11-09 12:02:46.000000000 +0100

+++ mfwksetup.pl        2007-11-09 12:16:58.000000000 +0100

@@ -292,7 +292,7 @@
# Look for Cacao in default location

if ( $MFWK_INSTALL_TYPE eq "tarball" ) {

-               $CACAO_RLOC_DIR = "$MFWK_BASEDIR/cacao_2.0";

+               $CACAO_RLOC_DIR = "$MFWK_BASEDIR/cacao_2";

$CACAO_ADM =         "$CACAO_RLOC_DIR/cacao/bin/cacaoadm";

$CACAO_HOME = "$CACAO_RLOC_DIR/cacao";

}elsif ( $MFWK_INSTALL_TYPE eq "linux_pkg_default" ){

@@ -333,9 +333,6 @@

$OS_CONF_DIRNAME = "sun/mfwk";

# No installf on Linux

$INSTALLF = "";

-       $MFWK_HOME = "$MFWK_BASEDIR/$OS_DIRNAME";

-       $MFWK_ETC = "$MFWK_CONF_BASEDIR/etc/opt/$OS_CONF_DIRNAME";

-       $MFWK_VAR = "$MFWK_CONF_BASEDIR/var/opt/$OS_CONF_DIRNAME";

$tmp = "/tmp";

if ( $MFWK_INSTALL_TYPE eq "tarball" ) {

$MFWK_CONF_BASEDIR = $MFWK_BASEDIR;

@@ -347,6 +344,9 @@

mLog "Error : unable to determine MFWK_INSTALL_TYPE : [$MFWK_INSTALL_TYPE]";

exit 1;

}

+       $MFWK_HOME = "$MFWK_BASEDIR/$OS_DIRNAME";

+       $MFWK_ETC = "$MFWK_CONF_BASEDIR/etc/opt/$OS_CONF_DIRNAME";

+       $MFWK_VAR = "$MFWK_CONF_BASEDIR/var/opt/$OS_CONF_DIRNAME";
}

################################
download mfwksetup diff
masetup.pl (don’t use the shell script, and remember you cannot install the Master Console on the same host as the node agent):
~/dsee6.2/dsee6/mfwk/bin$ diff -Naurw masetup.pl.orig masetup.pl

--- masetup.pl.orig     2007-11-09 12:15:59.000000000 +0100

+++ masetup.pl  2007-11-09 12:17:14.000000000 +0100

@@ -292,7 +292,7 @@
# Look for Cacao in default location

if ( $MFWK_INSTALL_TYPE eq "tarball" ) {

-               $CACAO_RLOC_DIR = "$MFWK_BASEDIR/cacao_2.0";

+               $CACAO_RLOC_DIR = "$MFWK_BASEDIR/cacao_2";

$CACAO_ADM =         "$CACAO_RLOC_DIR/cacao/bin/cacaoadm";

$CACAO_HOME = "$CACAO_RLOC_DIR/cacao";

}elsif ( $MFWK_INSTALL_TYPE eq "linux_pkg_default" ){

@@ -333,9 +333,6 @@

$OS_CONF_DIRNAME = "sun/mfwk";

# No installf on Linux

$INSTALLF = "";

-       $MFWK_HOME = "$MFWK_BASEDIR/$OS_DIRNAME";

-       $MFWK_ETC = "$MFWK_CONF_BASEDIR/etc/opt/$OS_CONF_DIRNAME";

-       $MFWK_VAR = "$MFWK_CONF_BASEDIR/var/opt/$OS_CONF_DIRNAME";

$tmp = "/tmp";

if ( $MFWK_INSTALL_TYPE eq "tarball" ) {

$MFWK_CONF_BASEDIR = $MFWK_BASEDIR;

@@ -347,7 +344,9 @@

mLog "Error : unable to determine MFWK_INSTALL_TYPE : [$MFWK_INSTALL_TYPE]";

exit 1;

}

-

+       $MFWK_HOME = "$MFWK_BASEDIR/$OS_DIRNAME";

+       $MFWK_ETC = "$MFWK_CONF_BASEDIR/etc/opt/$OS_CONF_DIRNAME";

+       $MFWK_VAR = "$MFWK_CONF_BASEDIR/var/opt/$OS_CONF_DIRNAME";

}

################################

#setupEnvironmentLinux
download masetup diff
Then run this to initialize the framework:
cd ~/dsee6.2/dsee6/mfwk/bin

./mfwksetup.pl -i
2. Enable the monitoring plugin in the DS instances to be monitored
Read on here.
3. Register the DS Module with the node agent
This is a tricky bit, because it is not documented well (should I say at all?). I assume it just works out of the box with the JES installer. Not so here:
cp ~/dsee6.2/dsee6/etc/opt/sun/mfwk/xml/com.sun.cmm.ds.xml ~/dsee6.2/
Then find this paragraph in the new copy in ~/dsee6.2/:
<parameter>

<!--

Java ES Product Name (exhaustive human readable string identifying the product)

This parameter must be filled and is case sensitive.

This paraneter string MUST be the SAME as the "PRODUCT_NAME_CTX_KEY" provided

at the initialize  method (Managed Element Server API) in the instrumented component product.

-->

<param-name>ProductName</param-name>

<param-value>DirectoryServer</param-value>

</parameter>
Change the parameter value to “Directory Server” (notice the blank) and locate this paragraph:
<parameter>

<!--

Java ES Installation Location

This parameter must be filled and is case sensitive.

The String used here MUST be the SAME as the "PRODUCT_COLLECTIONID_CTX_KEY" provided at

the initialize  method  (Managed Element Server API) in the instrumented component product.

-->

<param-name>InstalledLocation</param-name>

<param-value>/opt/SUNWds</param-value>

</parameter>
Here change the parameter value to the location where your DS installation resides (not the instance path). In our example that would be “/home/<username>/dsee6.2/ds6”. Finally, register the module:
$ ~/dsee6.2/dsee6/cacao_2/cacao/bin/cacaoadm deploy ~/dsee6.2/com.sun.cmm.ds.xml

$ ~/dsee6.2/dsee6/cacao_2/cacao/bin/cacaoadm register-module ~/dsee6.2/com.sun.cmm.ds.xml

$ ~/dsee6.2/dsee6/cacao_2/cacao/bin/cacaoadm stop

$ ~/dsee6.2/dsee6/cacao_2/cacao/bin/cacaoadm start

$ ~/dsee6.2/dsee6/cacao_2/cacao/bin/cacaoadm list-modules

$ ~/dsee6.2/dsee6/mfwk/bin/mfwkadm.orig list-modules
This last command should show a result like the following:
Installed products and their running instances:

==============================================
Instances for installed product: com.sun.cmm.ds:collectionID="/home/username/dsee6.2/ds6",name=Directory Server,type=CMM_InstalledProduct

-------------------------------
//home/username/dsee6-instances/6/com.sun.cmm.ds:name=/home/username/dsee6-instances/6,type=CMM_ApplicationSystem
If the DS shows up as an installed product but no active instance is displayed, then you either have not started your DS instance with the monitoring plugin enabled or have messed up the XML changes for the DS registration with the node agent. Watch out for warnings in the most recent “~/dsee6.2/dsee6/var/opt/sun/mfwk/logs/agent.log.?”. If there is a message about it not knowing what to do with a discovery message, look for a string like this “Directory Server#ds#/home/username/dsee6.2/ds6”. The first bit is the name, the second bit should be ok, the third bit is the installation path. Make sure that is exactly what you have in your XML.
What next?
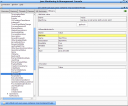
Fire up jconsole:
Connect to the cacao agent and start monitoring your directory server:
Next, install the Management Console on another machine as per JES docs.
Then go and write a DS plugin to Nagios or Munin :). Maybe this post by Steffo will be of use to you.

